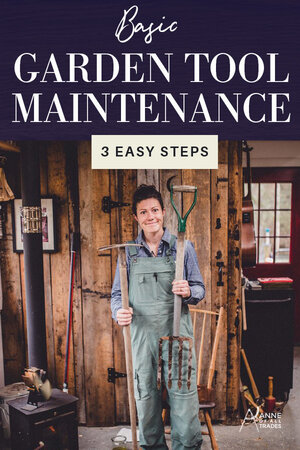
Garden Tool Maintenance in 3 Easy Steps!
Whether you’ve got that gardening itch to get your fingers in the soil, or you’re wrapping up your gardening year, it’s important to know some basic garden tool maintenance for both the quality and longevity of your tools.
You all know I love a good garage sale or antique store find, and when it comes to gardening tools, they don't make them like the used to. With a little TLC you can easily fix up old garden tools and restore them to their former glory.
Plus I’d always rather spend a bit more on a quality tool that I only have to buy once, rather than buying a new one each year because it’s cheaply made.
Regular care and maintenance of your garden tools will help them last for years to come. So whether you’re hoping it’s not too early to get some plants in the ground, or you’re wondering what you can plant in mid-summer, rest assured knowing your tools will be well cared for if you follow these tips.
Why Garden Tool Maintenance is Important
A sharp tool makes the work quicker and easier, but not only do garden tools need to be sharp, they should also be kept clean. This may seem strange for a tool that you use in the dirt, but hear me out…
When working in the soil your tools are coming into contact with bacteria, fungi and insects. If any of these things are an unwanted problem, you can easily spread the problem from garden area to garden area and around your yard or property. Keeping your tools clean can avoid this problem.
Regular Garden Tool Maintenance
It may seem easiest to just toss your garden tools off to the side of your garden for when you need them next, but this is actually the worst thing you could do for the longevity and quality of your tools.
Tools with wooden handles and metal fixtures are prone to drying out, splintering, rust, and/or corrosion, so storing them properly after every use is critical.
Furthermore, there are some additional tips that will help prolong the life of your tools:
Clean off any excess or caked-on soil after each use. Scrub with a wire brush, if needed, then dry completely and store.
Store tools in a well-ventilated, covered and dry area. Tools that are exposed to moisture will rust or corrode.
If tools were exposed to diseased plants, bacteria, fungi or any other undesirables, give them a good washing with soap and water, then dry completely and store.
A simple tip I picked up from Garden Design is to keep a bucket of sand mixed with boiled linseed oil (the sand should be damp, but not wet) and quickly shove your tools into the bucket of sand a few times to clean them off and protect the metal surfaces.
Always remove any sap or other debris as soon as you notice it. Orange essential oil can be useful for getting sap off. Try to avoid solvents like turpentine or mineral spirits because these tools will be going back into your soil. Clean the tool with warm soapy water after sap has been removed, dry completely and store.
Remove any signs of rust as soon as possible. You can learn how to remove rust from tools here.
Seasonal Garden Tool Maintenance
Whether you choose to polish up and maintain your garden tools at the end of the gardening season, or you like to do it just before spring, it’s important that your tools get some extra care at least once per year.
Smaller tools such as loppers, pruners and sheers (even hand tools like trowels or weeders) should get a good soak in some vinegar and water, then a good scrub with stainless steel to remove any rust.
To make it easier, I like to disassemble the tools as much as possible to make sharpening, sanding and oiling easier.
Basic Garden Tool Maintenance in 3 Easy Steps
I like to care for my garden tools in three simple steps: Sand, Oil, and Dress.
Sand
If your garden tool has a wooden handle take some 150 grit sandpaper across the grain. Follow that by sanding along the grain to remove splintery material. Finish sanding along the grain with some 220 grit sandpaper to get a nice smooth finish.
Oil
Generously apply oil with a paper towel. Using boiled linseed oil is great for this step. Let it sit for 20 minutes then wipe off excess oil. Reapply and repeat for multiple coats if desired. For old, neglected tools they may require a few extra coats. A good rule of thumb is to let the wood tell you when it’s conditioned. If your tool continues to soak up plenty of oil after 20 minutes, do another coat. Once it seems to have absorbed all it can handle, you can move on to the next step.
Dress
Use a file or a block of wood with sandpaper stuck to it to dress the edge of your edge tools (shovels, hoes, etc.). Try to match the previous angle and clean up the edge and remove any large, obvious nicks. It doesn't need to be sharp like a kitchen knife.
A sharpie is a great diagnostic tool for this process.
With a sanded oil handle and freshly dressed edges, your garden tools are now ready for another season!


